
Have you ever dabbled in the art of making your own bath bombs? It’s not just a fun DIY project; it’s a journey into creating something that’s both relaxing and beneficial for your body. Now, let’s talk about the star of the show: Epsom salt.
This isn’t just your average salt. Epsom salt, known scientifically as magnesium sulfate, is like a hidden gem in the world of bath time luxury.
Why am I so enthusiastic about this, you ask? Well, let me tell you a little story. A few years ago, after a particularly grueling week, my muscles were screaming for some TLC. I stumbled upon the idea of using Epsom salt in my bath.
Skeptical but desperate, I gave it a shot. The result? It was like a mini-vacation for my muscles – the relief was almost immediate, and the sense of relaxation was incredible.
From that day on, creating bath bombs with Epsom salt became more than just a hobby; it became my go-to solution for unwinding and recharging after a tough day.
In this article, we’re going to explore how you, too, can make these little bundles of joy. Whether it’s for a self-care day or as thoughtful handmade gifts, these bath bombs are sure to impress. So, let’s get started and dive into the world of homemade bath bombs with Epsom salt!

Contents
- The Benefits of Epsom Salts in Bath Bombs
- DIY Bath Bomb Recipe with Epsom Salts: What You Need
- Step-by-Step Guide to Making Your Bath Bomb
- Simple Ways to Personalize Your Bath Bombs
- Making Bath Bombs Do’s and Don’ts
- Storing and Using Bath Bombs: Tips for Longevity and Relaxation
- The Last Pop!
- Our Research & Review Process
The Benefits of Epsom Salts in Bath Bombs
When it comes to crafting the ultimate bath bomb, Epsom salt is not just an ingredient; it’s a game changer.
Epsom salt, or magnesium sulfate, does more than just make your bathwater feel nice. It’s a powerhouse of wellness benefits that transform your bath into a therapeutic sanctuary. Here’s some of the reasons we love soaking in it:
Muscle Relaxation: Just like a mini-massage, Epsom salt in your bath bomb can ease those achy muscles. It’s perfect after a long day or a tough workout.
Expert insights
“People use it to ease health problems, such as muscle soreness and stress. It’s also affordable, easy to use, and harmless when used appropriately.”
Rachael Ajmera, MS, RD, Healthline
Skin Care: Say goodbye to rough skin! Epsom salt gently exfoliates, leaving your skin smooth and refreshed.
Stress Relief: A soak in an Epsom salt bath bomb can help calm your mind and improve sleep. It’s like a stress-buster that you can enjoy in your tub.
Detox and Beauty: Epsom salt helps to draw out toxins, giving your skin a clean, rejuvenated feel.
So whether it’s for muscle relaxation, skin health, stress relief, or a beauty boost, Epsom salt really elevates your bath time, turning it into a soothing retreat.
Epsom salt is a popular remedy for many ailments.
Expert insights
“When used in bath bombs, Epsom salt can provide therapeutic benefits like soothing muscle tension and exfoliating skin. It’s a simple, natural way to enhance your bathing experience while taking care of your skin.”
Grace Harries-Wright M.D, Dermatologist/Cosmetologist
DIY Bath Bomb Recipe with Epsom Salts: What You Need
Creating your own Epsom salt bath bombs is easier than you think. Here’s a simple bath bomb recipe that uses epsoms salts and lush smelling coconut oil to get you started:
Ingredients:
- Epsom Salt: The star ingredient for muscle relaxation and skin exfoliation.
- Baking Soda: For that lovely fizz and skin softening.
- Citric Acid: Reacts with baking soda to create the fizz.
- Cornstarch or Arrowroot Powder: Makes your bath bomb smoother and less crumbly.
- Coconut Oil: Nourishes your skin, leaving it soft and moisturized.
- Essential Oils (optional): Adds a lovely scent and additional therapeutic properties.
- Food or Soap Coloring (optional): For that splash of fun and color.
- Witch Hazel or Water: Binds the mixture together.
Tools:
- Bath Bomb Molds: Shapes your bath bomb.
- Mixing Bowls: For preparing the mixture.
- Whisk: To mix the ingredients evenly.

Step-by-Step Guide to Making Your Bath Bomb
Ready to roll up your sleeves and dive into the world of DIY bath bomb making? It’s easier than you think, and oh-so-satisfying.
Whether you’re a seasoned DIY enthusiast or new to the craft, here’s how to make your own bath bombs with epsom salts at home step by step.
Step #1: Mix Dry Ingredients
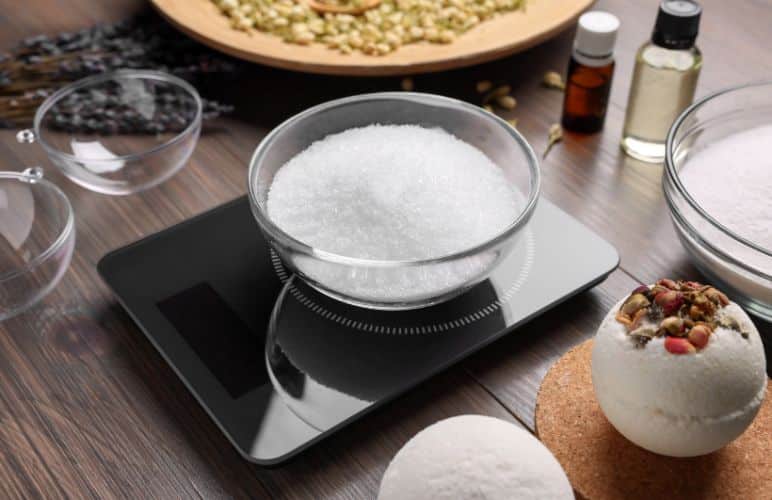
In a large bowl, whisk together 1 cup of baking soda, ½ cup of Epsom salt, ½ cup of citric acid, and ½ cup of cornstarch.
Ensure the mixture is lump-free.
Step #2: Blend In Your Wet Ingredients
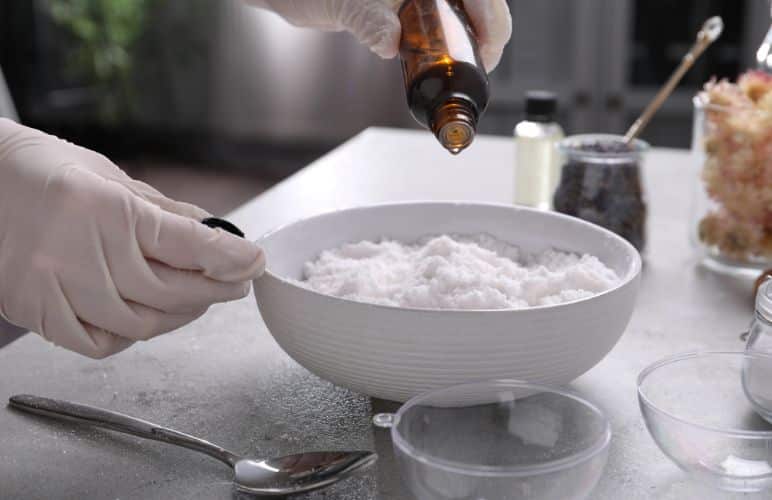
Melt about 2 tablespoons of coconut oil.
If you’re using essential oils, add a few drops to the melted coconut oil.
If you want a colorful bath bomb, separate a small portion of the Epsom salt into a different bowl.
Add a few drops of your chosen coloring to the salt and mix well.
Step #3: Combine Wet and Dry Ingredients

Slowly add the wet ingredients to the dry mixture, stirring constantly to prevent the mixture from fizzing.
Spray a little witch hazel or water if the mixture is too dry. It should have the consistency of damp sand.
Step #4: Mold Your Bath Bombs:

Quickly pack the mixture into your bath bomb molds.
If you have two-part molds, overfill each half slightly and press them together firmly.
Step #5: Let Them Set

Allow the bath bombs to dry for at least 24 hours in a cool, dry place.
If you’re using single-sided molds, gently tap the mold to release the bath bomb after it’s set.
And that’s it!
Once fully dry, your bath bombs are ready to use or wrap as a thoughtful, handmade gift!
Simple Ways to Personalize Your Bath Bombs
Creating unique bath bombs is all about adding your personal touch. Here are some easy ideas to make yours special:
- Different Molds: Go beyond round – try stars, hearts, or animals for fun shapes.
- Natural Colors: Use beetroot or spirulina powder for beautiful, natural hues.
- Essential Oils: Pick your favorite scents like lavender or citrus for mood enhancement.
- Dried Flowers: Add rose petals or lavender buds for elegance and fragrance.
- Surprise Inside: Place a small toy or note inside for a fun or romantic touch.
- Sparkle and Glow: Use biodegradable glitter or glow-in-the-dark pigment for a bit of dazzle.
- Textural Elements: Oatmeal for luxurious softness, or extra Epsom salt for a mineral boost.
- Gift-Ready Presentation: Wrap them up nicely for a perfect homemade gift.
Get creative and enjoy making bath bombs that are uniquely you!

Making Bath Bombs Do’s and Don’ts
Making bath bombs can be as relaxing as using them, but sometimes things don’t go as planned.
Here are some handy dos and don’ts from my own experience to help you navigate common things that can go wrong!
Do’s
How to make bath bombs successfully
- Do Measure Accurately: Precise measurements are key. Too much liquid can set off the fizz prematurely, while too little might not bind the mixture.
- Do Mix Thoroughly: Ensure that your dry and wet ingredients are well combined to avoid a grainy texture.
- Do Pack Firmly: When molding your bath bombs, pack the mixture tightly into the molds to prevent them from falling apart.
- Do Allow Enough Drying Time: Patience is crucial. Let your bath bombs dry completely, ideally 24 hours, before using or packaging them.
Don’ts
How to make bath bombs successfully
- Don’t Rush the Process: Adding wet ingredients too quickly can activate the citric acid. Add slowly and mix as you go.
- Don’t Use Too Much Water: If the mixture is too wet, it can start the fizzing reaction prematurely. Use a spray bottle for better control.
- Don’t Store in Humid Areas: Humidity can ruin your bath bombs. Store them in a dry place to keep them intact.
- Don’t Ignore Clumps: Break up any clumps in the dry mixture before adding liquids. Clumps can cause your bath bombs to crumble.

Storing and Using Bath Bombs: Tips for Longevity and Relaxation
Once you’ve crafted your delightful bath bombs, proper storage and use are key to getting the most out of them. Here are some straightforward tips to ensure your bath bombs stay fresh and provide the best bathing experience:
Storing Your Bath Bombs:
Keep Them Dry: Store your bath bombs in a dry place. Moisture is their biggest enemy, so avoid humid areas like the bathroom.
Airtight Containers: Use airtight containers or ziplock bags to protect them from moisture and preserve their fizz.
Separate Fragrances: If you’ve made different scents, store them separately. This prevents scents from blending together.
Dark and Cool: Keep the bath bombs in a dark and cool spot to maintain their colors and prevent any reactions from light or heat.
Top Tips For Using Your Bath Bombs
- One at a Time: For a full, luxurious experience, use one bath bomb per bath. It’s tempting to throw in a couple, but one is usually enough to do the trick.
- Water Temperature: Use warm water for your bath. It helps dissolve the bath bomb properly and is soothing for your body.
- Full Dissolve: Let the bath bomb dissolve completely before you hop in. This allows all the essential oils, fragrances, and salts to mix into the water.
- Soak and Relax: Spend at least 15-20 minutes in the bath to enjoy the full benefits. It’s your personal spa time, so make the most of it!
- Skin Sensitivity Check: If you have sensitive skin, test the bath bomb in a small amount of water first to ensure it doesn’t cause irritation.
The Last Pop!
And there you have it, a complete guide to making your own Epsom salt bath bombs, from the mixing bowl to the bathtub. Creating these little fizzing wonders is more than just a craft; it’s about carving out a slice of tranquility in your busy life. Each bath bomb holds the promise of a peaceful, pampering retreat in the comfort of your own home.
Remember, the joy of DIY bath bombs lies not only in the making but also in the delight of using them. Whether it’s unwinding after a long day, finding a moment of peace, or gifting a loved one with a handmade token of care, these bath bombs are your ticket to simple luxuries.
So, next time you find yourself yearning for a bit of relaxation, know that a soothing, fragrant bath is just a bath bomb away. Happy crafting and even happier soaking!
Discovered the perfect bath bomb for you? Tell us about it! Tag us on Instagram @heyfizzywizz or share your relaxing moments on our Facebook page. Join our community and exchange your favorite bath time rituals with fellow enthusiasts. Fancy making your own bath bombs? It’s easy! Check out our DIY Bath Bomb Recipes!

Our Research & Review Process
At Fizzy Wizz, we’re dedicated to ensuring that our recommendations for bath bombs are thorough, reliable, and genuinely useful. To achieve this, we’ve established a comprehensive research and review process.
We delve into the science behind bath bombs, citing evidence from cosmetic and dermatological studies. We gather real user reviews and seek unbiased insights from experts in skincare and aromatherapy, as well as from everyday bath bomb enthusiasts.
Our hands-on testing is at the core of our process. We personally try out a wide range of bath bombs, assessing them on various criteria such as scent intensity, skin compatibility, ingredient quality, and fizziness. We test these bath bombs in different water types and bathroom environments to ensure a well-rounded review.
This meticulous approach enables us to provide you with honest, insightful, and practical information about which bath bombs truly deliver on their promises.
Remember, everyone’s skin and preferences are different, so we always recommend patch testing new products if you have sensitive skin.

