
As a dab-hand at the DIY bath bomb craze, I’ve learned a thing or two, especially when it comes to coloring them.
With my sensitive skin always throwing a fit with the wrong products, I found myself on a mission. It wasn’t just about making something pretty; it was about finding a way to do it that wouldn’t make my skin protest or leave a nasty footprint on our beautiful planet.
That’s where the magic of natural colorants comes in.
They’re a game changer if you have sensitive skin. We’re talking colors borrowed straight from nature—gentle, non-toxic, and completely in tune with the environment.
Whether you’re crafting bath bombs for some me-time luxury or as thoughtful gifts, choosing natural colorants is a win-win.
I’m here to share how you can keep your bath bombs skin-friendly and eco-friendly, without compromising on the fun and fizz. Let’s jump into how these earthy hues can transform your bath time into an eco-luxe experience, shall we?
Why Choose Natural Colorants?
Coloring bath bombs the natural way isn’t just a trend; it’s a smart choice for both personal health and environmental well-being. Let’s break it down:
Skin Health
Synthetic dyes might offer a rainbow of colors, but they’re not always kind to your skin. For those of us with sensitive skin, artificial colors can lead to irritation, redness, or worse.
Natural colorants, sourced from plants, minerals, and other earth-friendly materials, are much gentler. They can even offer additional benefits to your skin, such as hydration or soothing properties, without the risk of harsh reactions.
Environmental Impact
The production and disposal of synthetic dyes can be harsh on our planet. They often require toxic chemicals to produce and can contribute to pollution when they wash down our drains.
Natural colorants, on the other hand, are biodegradable and sourced from renewable resources. By choosing these for your bath bombs, you’re making a choice that supports the health of our ecosystems.
Beyond being safer for you and the planet, natural colorants often come with their own set of perks.
Many have therapeutic properties, like calming inflammation or offering antioxidants, which can transform your bath into a healing experience. Plus, they bring a touch of nature into your bathroom, with hues that range from soft pastels to rich, earthy tones.
Expert insights
“Natural colorants in bath bombs are not just skin-friendly, but also eco-conscious choices. Unlike synthetic dyes, they minimize the risk of irritation and often provide additional benefits, like antioxidants for skin health.”
Grace Harries-Wright M.D, Dermatologist/Cosmetologist
Contents
- 8 Natural Colorants You Can Use for Bath Bombs
- Picking the Perfect Natural Colorant
- All About Preparation and Mixing Techniques
- Step-by-Step Guide to Making Naturally Colored Bath Bombs
- Watch & Learn: How to Make Bath Bombs at Home
- DIY Bath Bombs Troubleshooting Tips
- Creative Spark: Natural Bath Bombs Designs
- Keep it Eco-Friendly
- The Final Pop!
- Our Research & Review Process
8 Natural Colorants You Can Use for Bath Bombs
When it comes to coloring your bath bombs naturally, there’s a whole rainbow of options available that are kind to your skin and the environment.
Here are eight natural colorants that can bring vibrant colors to your bath bombs:
#1 Spirulina

This superfood algae gives a range of greens, from seafoam to deep forest, perfect for an earthy, natural look. Plus, it’s great for your skin.
#2 Matcha
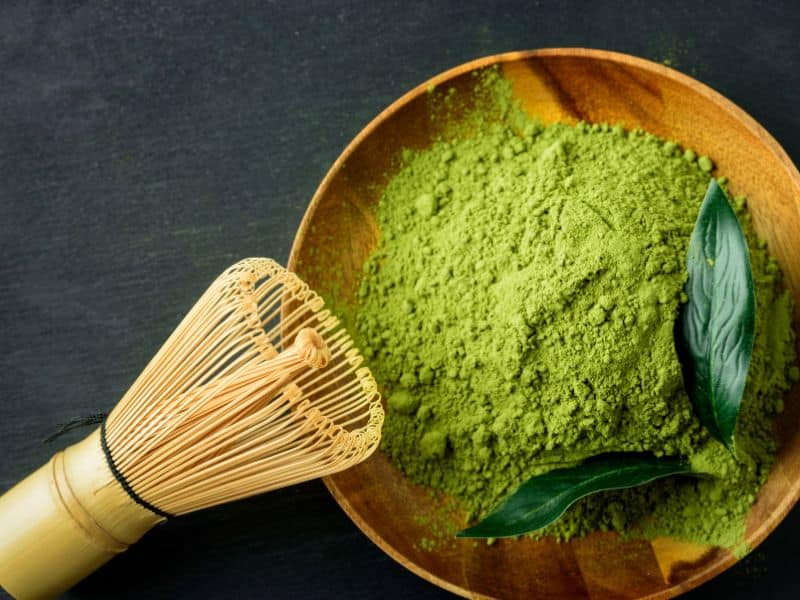
A softer, lighter green, matcha is ideal for pastel hues. It also packs a punch with antioxidants, which are a bonus for bath time.
#3 Madder Root

Looking for pink or red? Madder root has you covered. It can range from a soft blush to a bold ruby, depending on how much you use.
#4 Cocoa Powder

For warm browns and a hint of chocolatey scent, cocoa powder is your go-to. It’s also moisturizing, making it a double win.
#5 Beetroot Powder
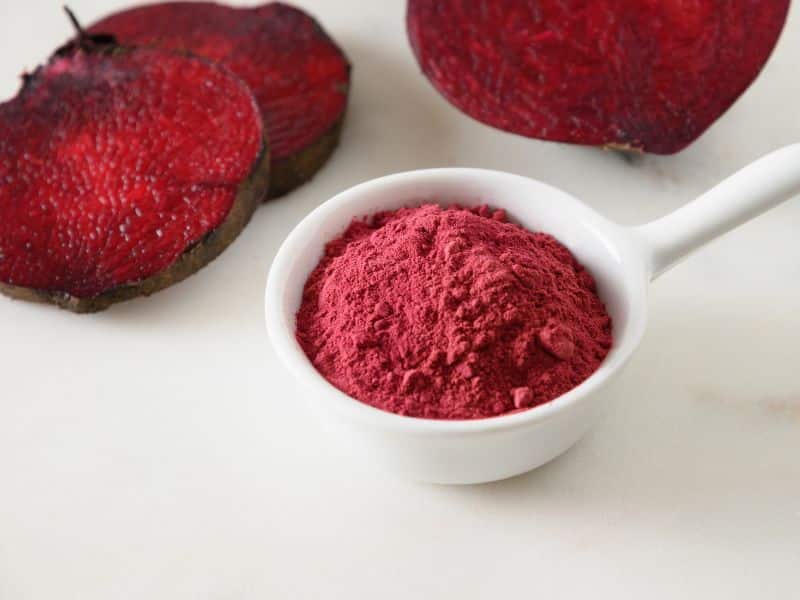
If you’re after a vibrant pink or a deep magenta, beetroot powder can deliver, along with a dose of vitamins for your skin.
#6 Turmeric

This spice isn’t just for cooking; it can provide your bath bombs with bright yellows and golden hues. And yes, it’s as good for your skin as it is for your insides.
#7 Activated Charcoal

For a dramatic black or a smoky gray, activated charcoal is unbeatable. It’s also known for its detoxifying properties.
#8 Clays
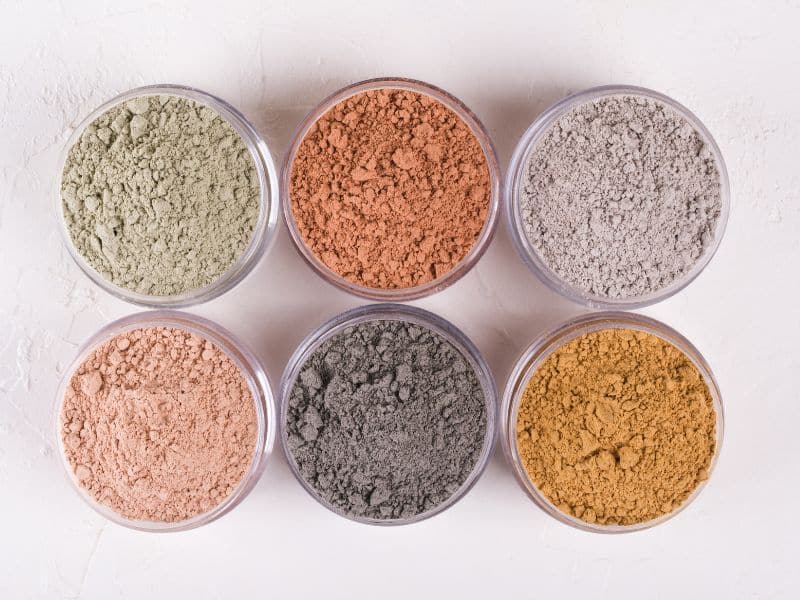
Various clays can offer a spectrum of colors—pink, red, green, and even blue. Beyond coloring, they can help detox and smooth the skin.
Using these natural colorants not only adds a personal touch to your bath bombs but also ensures you’re avoiding synthetic dyes that can be harsh on the skin and the environment.
Picking the Perfect Natural Colorant
Choosing the right natural colorant for your bath bombs is key to achieving the perfect shade while ensuring the product is kind to your skin and the environment. Here’s a guide to help you select the best natural colorants based on the color you’re aiming for.
Match Your Mood with Color: Want to relax? Soft, calming colors like light purples or blues, achieved with lavender or blueberry powder, are your friends. Looking for an energy boost? Go for vibrant oranges or yellows from turmeric or calendula.
Know Your Colorant’s Personality: Each natural colorant brings its own vibe. For instance, beetroot gives a lovely pink but might need a bit more work to get the color just right without leaving any bath tub rings. Spirulina, with its green hue, is great for that mermaid bath experience but remember, a little goes a long way.
Mix and Match: Don’t shy away from playing scientist and mixing colorants to get that unique shade. But remember, natural colorants are like spices; some are stronger than others. Start small, then adjust.
Consider the Benefits: Beyond the color, what else does your colorant bring to the bath bomb party? Chamomile’s not just for a subtle yellow; it’s also super soothing for your skin.
Test Run is a Must: Always, and I mean always, do a small test batch first. Natural colorants can be unpredictable. You don’t want to end up with a bath bomb that’s more of a surprise bomb when it hits the water.
Stain-Check: Some colorants can be cheeky and leave a mark. Ingredients like activated charcoal are amazing for a detox bath but might require a quick rinse of the tub afterward.
All About Preparation and Mixing Techniques
Alright, let’s get into the nitty-gritty of mixing and preparing those vibrant colors into your bath bombs. The secret sauce? It’s all about when and how you add your natural colorants.
Mixing It Up: Liquid vs. Dry Phase
Liquid Phase: This is when you mix your colors with the wet ingredients before combining everything together. It’s a bit like making a cake batter; you want your colors evenly mixed into the liquids for a uniform look.
Pros:
- Great for achieving an even, consistent color throughout your bath bomb.
- Works wonders with liquid-based colorants or very fine powders that dissolve easily.
Cons:
- Can be tricky with water-sensitive ingredients. Add too much liquid, and you might kickstart the fizzing reaction before the bomb even hits the bath.
- Some powders might not dissolve completely, leaving you with a speckled effect (which could be a pro if that’s what you’re after!).
Dry Phase: Here, you’re adding your colorants directly to the dry ingredients. Think of it as seasoning your flour before mixing it into the dough.
Pros:
- Easier to control the reaction since you’re not adding extra moisture.
- Perfect for creating layered or marbled effects by mixing different colored powders with portions of the dry mix before combining them all.
Cons:
- Can result in uneven color distribution if not mixed thoroughly.
- Some colors might change or not be as vibrant once they mix with the wet ingredients and hit the water.
Tips for Perfect Color Mixing
- Start Small: You can always add more color, but you can’t take it away. Begin with a tiny amount, mix, and then adjust as needed.
- Sift Your Powders: This ensures even distribution and prevents clumps, making your color as even as possible.
- Test in Water: Before going full-scale, test a small amount of your colored mix in water. This gives you a real-time preview of how the colors will behave in the bath.
- Document Your Recipes: Found the perfect shade? Make sure you jot down how you got there, including the exact ratios and techniques used. This is your blueprint for future bath bomb success.
Remember, making bath bombs is as much an art as it is a science. Sometimes, the best results come from a little experimentation and a lot of fun mixing things up!
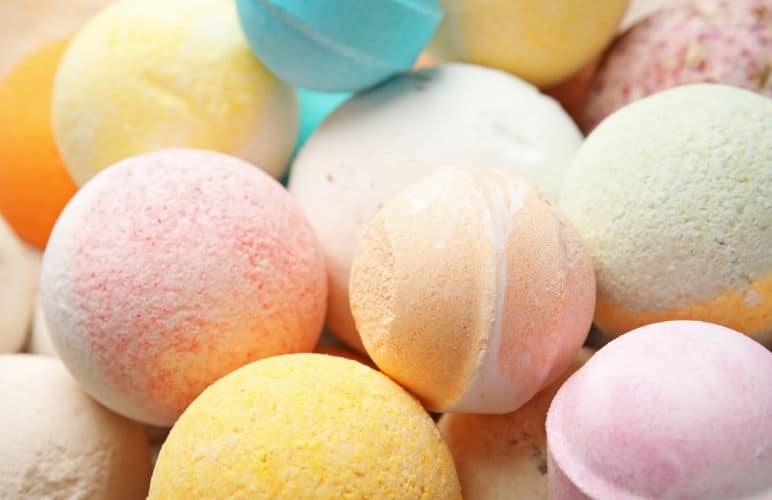
Step-by-Step Guide to Making Naturally Colored Bath Bombs
Making naturally colored bath bombs is a fun and creative process. Here’s a step-by-step guide to help you craft your own, with tips on incorporating essential oils and achieving those vibrant colors you’re after.
Step 1: Gather Your Ingredients and Tools
You’ll need:
- Baking soda
- Citric acid
- Natural colorants (e.g., beetroot powder, spirulina)
- Essential oils (for scent)
- Carrier oil (like coconut or almond oil)
- Witch hazel or water in a spray bottle
- Bath bomb molds
- Mixing bowls
- Whisk
Step 2: Mix Dry Ingredients
In a large bowl, combine 1 cup of baking soda and 1/2 cup of citric acid. If you’re adding dry colorants, like powders or clay, now’s the time. Sift and whisk them together to avoid clumps and ensure an even color distribution.
Step 3: Add Color and Scents
Slowly mix in your natural colorants. Start small — you can always add more to intensify the color. For essential oils, 10-20 drops should suffice for a subtle aroma. Mix these with your carrier oil before adding to ensure the scent is well-distributed throughout your bath bombs.
Step 4: Wet the Mixture
This step is crucial. Mist your dry mix with witch hazel or water sparingly while continuously stirring. The goal is to get the mixture damp enough to stick together without starting the fizzing reaction. The perfect consistency is similar to damp sand.
Step 5: Mold Your Bath Bombs
Quickly pack the mixture into your bath bomb molds. Press firmly to ensure there are no air pockets. If using a two-piece mold, slightly overfill each half before pressing them together to ensure they stick.
Step 6: Let Them Dry
Once molded, gently remove your bath bombs and place them on a soft towel or egg carton to dry. They need to set for at least 24 hours in a cool, dry place. If they’re still a bit moist after 24 hours, let them dry longer to ensure they harden fully.
Top Tips for Success
- Essential Oils: Choose oils not just for their scent but for their skin benefits too. Lavender for relaxation, citrus for an energy boost, and eucalyptus for a refreshing experience.
- Vibrant Colors: For deeper colors, increase the amount of colorant gradually. Remember, the color might look different when mixed, so always test a small batch in water first.
- Troubleshooting: If your bath bombs crumble, they might be too dry. Spritz them with a bit of witch hazel and try again. If they expand in the mold, you’ve added too much moisture. Adjust accordingly.
Crafting bath bombs is all about experimentation and fun. Play with colors, scents, and shapes to create something truly unique. And remember, the more you make, the better you’ll get at finding the perfect balance of ingredients for that ideal fizz, color, and aroma. Happy crafting!
Watch & Learn: How to Make Bath Bombs at Home
Here’s a great video tutorial that guides you through how to make bath bombs at home as naturally as possible using natural ingredients and colorants.
DIY Bath Bombs Troubleshooting Tips
The world of DIY bath bombs can be as fun as it is challenging. Here are some common hurdles you might face along the way and how to leap over them:
Bath Bombs Sticking to Molds
The Issue: Your bath bomb won’t come out, clinging to the mold like a scared cat to a tree.
The Fix: Lightly oil your molds with a thin layer of a neutral oil like sweet almond or canola before filling. If they’re already stuck, tap the mold gently on a hard surface to loosen them without breaking.
Bath Bombs Not Fizzing Enough
The Issue: You drop your creation into the tub, and… it’s more of a lazy plop than a fizzy spectacle.
The Fix: This usually means not enough citric acid. Ensure you’re using a 2:1 ratio of baking soda to citric acid. Also, make sure your mixture isn’t too wet when molding, as premature activation can occur.
Crumbly Bath Bombs
The Issue: Instead of holding their shape, your bath bombs crumble apart, looking more like moon sand than a solid ball.
The Fix: The mix might be too dry. Spritz it with a bit of witch hazel or water, just enough so when you squeeze it in your hand, it holds shape. Mix well between spritzes to avoid activating the fizz.
Bath Bombs Expanding in the Mold
The Issue: Your bath bombs are growing, spilling over the mold like dough over a bread pan.
The Fix: Too much moisture is the likely culprit. Cut back on the liquid in your recipe, or add a bit more dry ingredients to balance it out. Also, work in a low-humidity environment if possible.
Color Fading or Not Showing
The Issue: The vibrant color you aimed for is either fading away or not showing up in your bath water.
The Fix: Some natural colorants may not dissolve fully in water, leading to faint colors. Try increasing the amount of colorant gradually or switch to a different natural dye that’s known for its solubility and vibrancy in water.
Uneven Colors
The Issue: Instead of an even tone, your bath bombs have a tie-dye effect (unintentionally).
The Fix: Ensure you’re mixing your colorant thoroughly with the dry ingredients before adding any liquids. Sifting your dry ingredients together can also help prevent this issue.
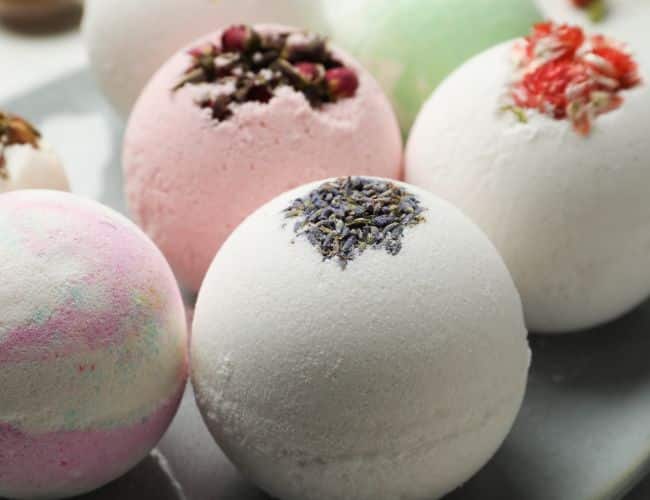
Creative Spark: Natural Bath Bombs Designs
- Marble Magic: Swirl together two or more natural colorant powders without fully mixing them. This creates a stunning marble effect in each bomb.
- Herbal Charm: Embed dried flowers or herbs like lavender, rose petals, or chamomile into your bombs for a touch of nature that will float on the water surface.
- Layered Look: Carefully layer different colored mixtures in the mold. Gently tap down each layer before adding the next for a striped effect.
- Center Surprise: Place a small, solid ingredient like a dried flower or a citrus peel piece in the center of your mold before adding your mixture for a hidden core that’s revealed in the bath.
Keep it Eco-Friendly
Embracing eco-friendly practices in our bath bomb crafting not only benefits the planet but also aligns with the wholesome, natural essence of our creations. Here’s how we can make sustainability a part of our bath bomb journey:
- Reuse and Recycle Molds: Instead of buying new molds for every project, opt for durable, reusable ones. You can even get creative with household items like ice cube trays or Easter egg shells as molds.
- Eco-Friendly Packaging: When it’s time to wrap up your bath bombs for storage or gifting, choose materials that are kind to the Earth. Biodegradable wrap, recycled paper, or reusable cloth bags not only look beautiful but also minimize waste.
- Source Responsibly: Aim to purchase your ingredients from suppliers who prioritize sustainability, whether it’s through organic farming practices, ethical sourcing, or minimal packaging.
- Compostable Decor: If you love decorating your bath bombs with a little extra flair, look for compostable or biodegradable options like dried flower petals or herbs that won’t harm the environment after they’ve served their purpose.
By incorporating these simple, eco-conscious practices into our crafting, we not only create a product that’s good for the skin and soothing to the soul but also gentle on our planet.
The Final Pop!
Stepping into the world of DIY bath bombs, especially with a focus on natural colorants and eco-friendly practices, is more than a crafting journey—it’s a commitment to healthier, more sustainable living.
From choosing the right natural colorants to perfecting your mixing technique, and from innovative design ideas to embracing eco-conscious crafting habits, every step you take brings a touch of personal care and environmental respect into your creations.
As we wrap up this guide, remember that the beauty of making bath bombs lies not just in the fizzy delights they bring to your bath time but also in the mindful approach you take in crafting them.
By selecting skin-friendly, natural colorants, you’re not only ensuring a safe, enjoyable experience for yourself and your loved ones but also contributing to a healthier planet.
Discovered the perfect bath bomb for you? Tell us about it! Tag us on Instagram @heyfizzywizz or share your relaxing moments on our Facebook page. Join our community and exchange your favorite bath time rituals with fellow enthusiasts. Fancy making your own bath bombs? It’s easy! Check out our DIY Bath Bomb Recipes!

Our Research & Review Process
At Fizzy Wizz, we’re dedicated to ensuring that our recommendations for bath bombs are thorough, reliable, and genuinely useful. To achieve this, we’ve established a comprehensive research and review process.
We delve into the science behind bath bombs, citing evidence from cosmetic and dermatological studies. We gather real user reviews and seek unbiased insights from experts in skincare and aromatherapy, as well as from everyday bath bomb enthusiasts.
Our hands-on testing is at the core of our process. We personally try out a wide range of bath bombs, assessing them on various criteria such as scent intensity, skin compatibility, ingredient quality, and fizziness. We test these bath bombs in different water types and bathroom environments to ensure a well-rounded review.
This meticulous approach enables us to provide you with honest, insightful, and practical information about which bath bombs truly deliver on their promises.
Remember, everyone’s skin and preferences are different, so we always recommend patch testing new products if you have sensitive skin.

